You can create enchanting garden paths this weekend for under $100 with a few easy DIY ideas. Try a pebble pathway for a natural look, or use wooden pallets for an eco-friendly option. Consider a charming stepping stone trail or a low-maintenance gravel path. For a classic touch, use bricks or recycled tiles. Each of these options adds beauty and functionality to your garden. Stick around to discover more creative ideas for your outdoor space!
Key Takeaways
- Create a Wooden Pallet Walkway by repurposing pallets, which can be sourced for free, providing a rustic and eco-friendly path.
- Design a Cinder Block Walkway using affordable cinder blocks; clear and level the ground for a simple, durable pathway.
- Construct a Gravel Garden Path with your choice of gravel, layering landscape fabric underneath to suppress weeds and ensure low maintenance.
- Build a Recycled Tile Walkway using broken tiles; arrange creatively, secure with adhesive, and fill gaps with sand for a unique look.
- Lay a Pebble Pathway by digging, layering landscape fabric and gravel, then adding pebbles for a natural and sturdy walking surface.
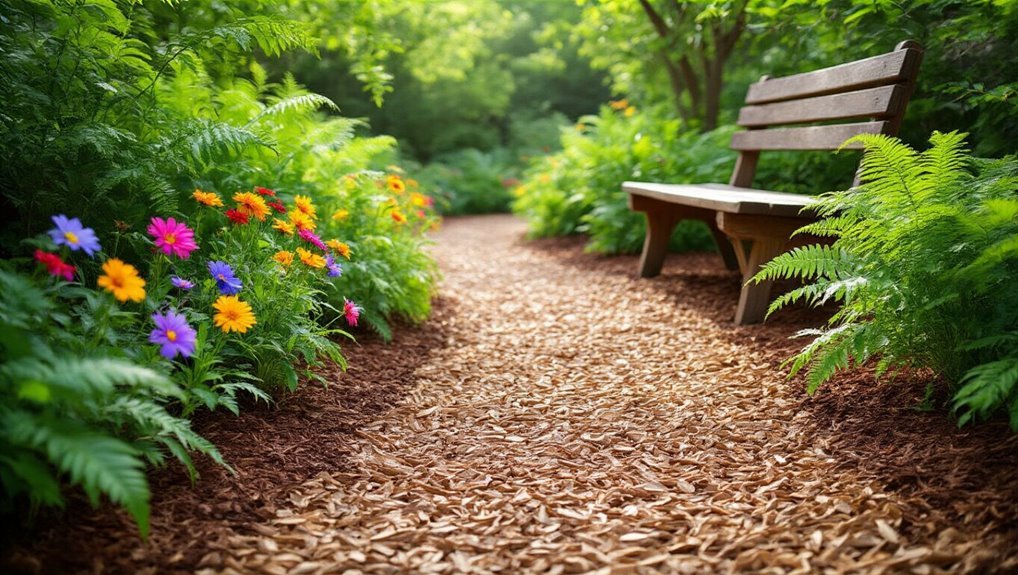
Pebble Pathway
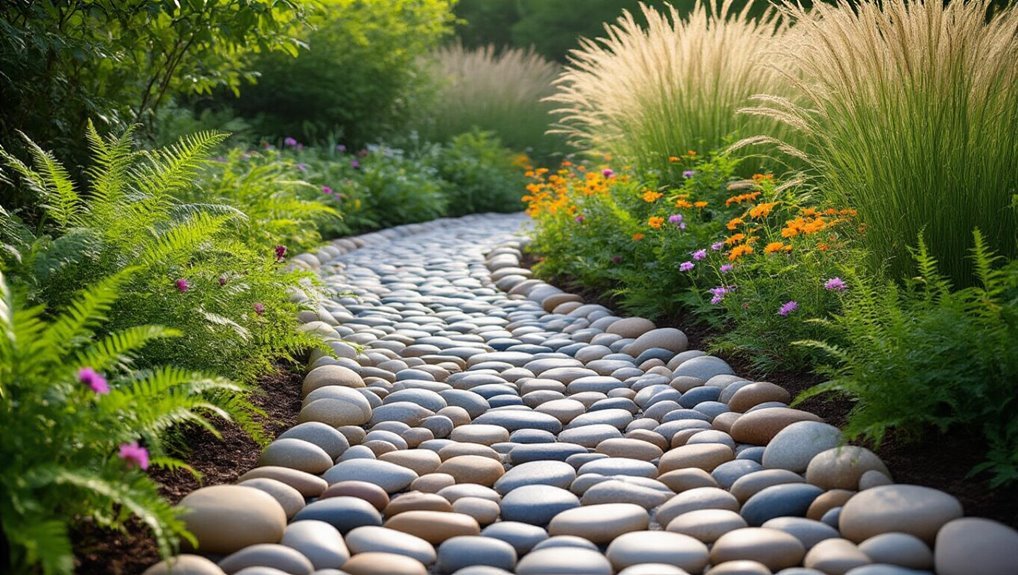
A pebble pathway is a charming and practical addition to any garden. It offers a natural look that complements your landscape while providing a sturdy surface for walking. For best results, consider using essential garden shovels to make digging and shaping the trench more efficient. To create yours, start by selecting a location that connects key areas in your garden. Clear the space of grass and debris, then outline your desired shape with stakes and string.
Next, dig a shallow trench, about three inches deep. Lay down landscape fabric to prevent weeds, followed by a layer of gravel for drainage.
Finally, pour your chosen pebbles into the trench, spreading them evenly. This DIY project not only enhances your garden’s aesthetic but also improves accessibility, making it a rewarding weekend task you can complete with ease. For digging and shaping the trench, using a garden trowel can make the process much easier and more precise.
Wooden Pallet Walkway
Transforming your garden with a wooden pallet walkway is an eco-friendly and budget-friendly project you can tackle in a weekend. Start by collecting used pallets, which are often free or inexpensive. Clean them thoroughly and, if needed, sand the surfaces for a smoother finish. You can arrange the pallets in a straight line or create a winding path, depending on your garden’s layout. For an even greener approach, consider pairing your walkway with outdoor composting systems to further enhance your garden’s sustainability.
Here’s a quick overview of what you’ll need:
| Item | Quantity | Cost Estimate |
|---|---|---|
| Wooden pallets | 4-6 | Free-$20 |
| Sandpaper | 1 pack | $5 |
| Outdoor sealant | 1 can | $15 |
Adding a compost bin to your garden path project is another sustainable upgrade that can help reduce waste while enriching your soil. With these materials, you’ll be on your way to a charming and practical walkway!
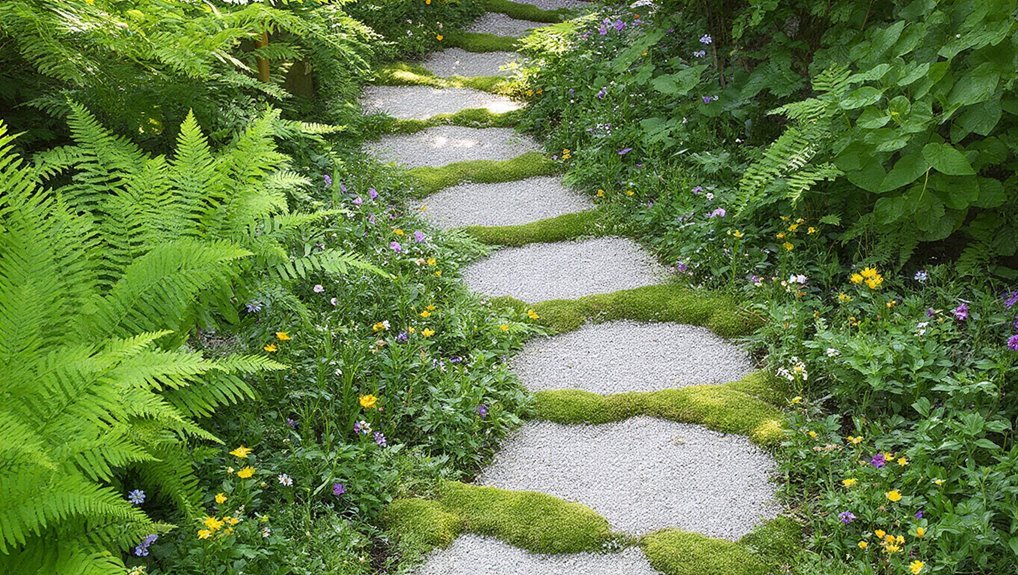
Stepping Stone Trail
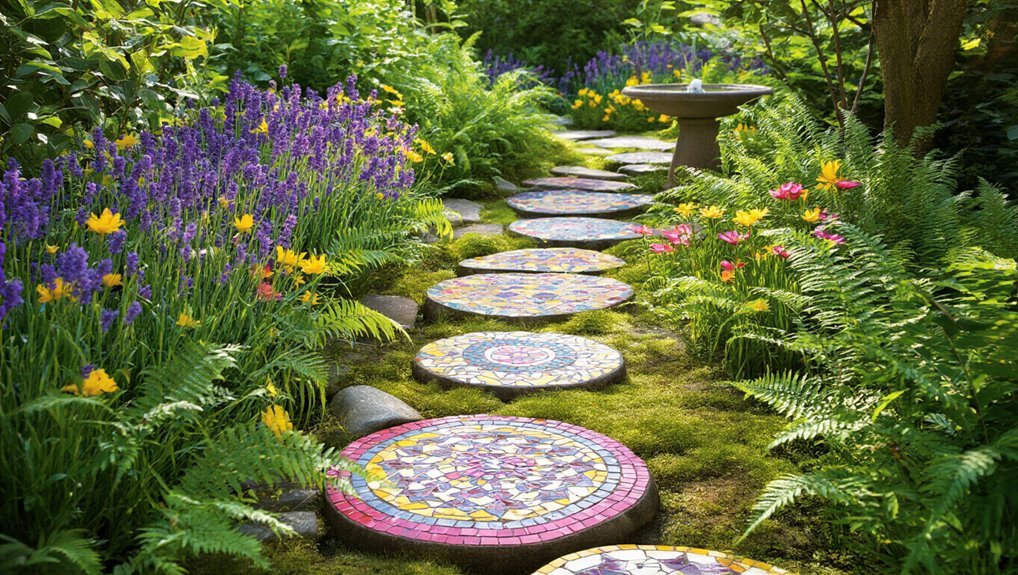
Creating a stepping stone trail can add a whimsical touch to your garden while providing a functional path.
Start by selecting your stones; you can use concrete pavers, natural stones, or even repurposed tiles. Lay them out in a pattern that flows naturally through your garden, ensuring they’re spaced comfortably for walking. To further enhance the entrance to your trail, consider incorporating beautiful plant pots along the sides for added color and visual interest.
Next, dig shallow holes for each stone to sit level with the ground, allowing for easier mowing and maintenance. Fill the gaps with gravel, soil, or moss to enhance the aesthetic.
Once set, you can decorate around the stones with flowers or ground cover to create a lush look. Your stepping stone trail won’t only guide visitors but also invite exploration in your enchanting garden. For an even more personalized touch, consider incorporating decorative garden stones to elevate both the beauty and character of your outdoor space.
Gravel Garden Path

If you want a low-maintenance yet stylish option for your garden path, consider a gravel garden path. It’s an easy DIY project that allows you to customize the look and feel of your outdoor space. Plus, you can choose from various colors and sizes of gravel to match your garden’s aesthetic. Adding mulch along the edges of your path can help with moisture retention and weed suppression, making your garden even easier to maintain.
Here’s a quick comparison of gravel types:
| Gravel Type | Texture |
|---|---|
| Pea Gravel | Smooth and rounded |
| Crushed Stone | Angular and jagged |
| River Rock | Polished and large |
| Decomposed Granite | Fines and compact |
| Lava Rock | Lightweight and porous |
Lay a landscape fabric underneath to prevent weeds, and you’ll have a charming path that enhances your garden’s beauty! For the healthiest and most vibrant plants along your path, be sure to prepare the borders with the best garden soil to promote thriving growth.
Brick or Paver Path
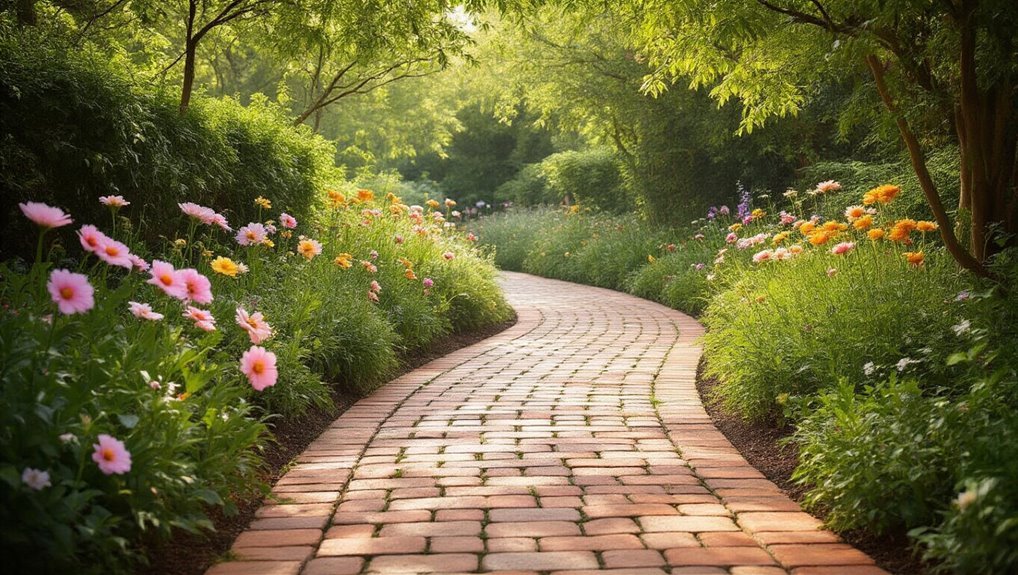
A brick or paver path can add timeless elegance to your garden while providing a durable walking surface. You’ll appreciate how easy it’s to install a path that enhances the beauty of your outdoor space. For gardeners who want to keep their space tidy, storing your tools in garden tool organizers ensures everything is easily accessible for your path project.
Start by choosing bricks or pavers that complement your garden’s style. Here are a few essential steps to get you started:
- Plan your layout: Decide on the path’s shape and size.
- Prepare the area: Clear the ground and ensure a level base.
- Lay the bricks or pavers: Start from one end and work your way to the other, ensuring they’re snug.
- Fill gaps: Use sand or gravel to stabilize and complete your pathway.
For best results, consider using edging tools to keep your path neat and prevent the bricks or pavers from shifting over time. With a little effort, you’ll create an inviting space for strolls in your garden!
Mulch or Wood Chip Path
Mulch or wood chip paths offer an affordable and natural option for enhancing your garden’s aesthetics while providing a soft surface for walking. These paths are easy to install and blend beautifully with your landscape. You can choose a variety of materials to suit your style and budget. For a sustainable and eco-friendly choice, consider using organic mulching materials such as straw to further enrich your garden environment. If you’re looking to make your garden even more eco-friendly, incorporating compost tumblers can provide you with a steady supply of nutrient-rich compost to use beneath your mulch paths.
Here’s a quick comparison to help you decide:
| Material | Benefits | Considerations |
|---|---|---|
| Wood Chips | Natural look, biodegradable | Needs replenishing often |
| Bark Mulch | Long-lasting, moisture-retaining | May attract pests |
| Cocoa Hulls | Pleasant aroma, attractive | Can be toxic to pets |
| Pine Needles | Lightweight, acidifies soil | Slippery when wet |
With a little effort, you can create a charming path that invites visitors into your garden oasis!
Recycled Tile Path
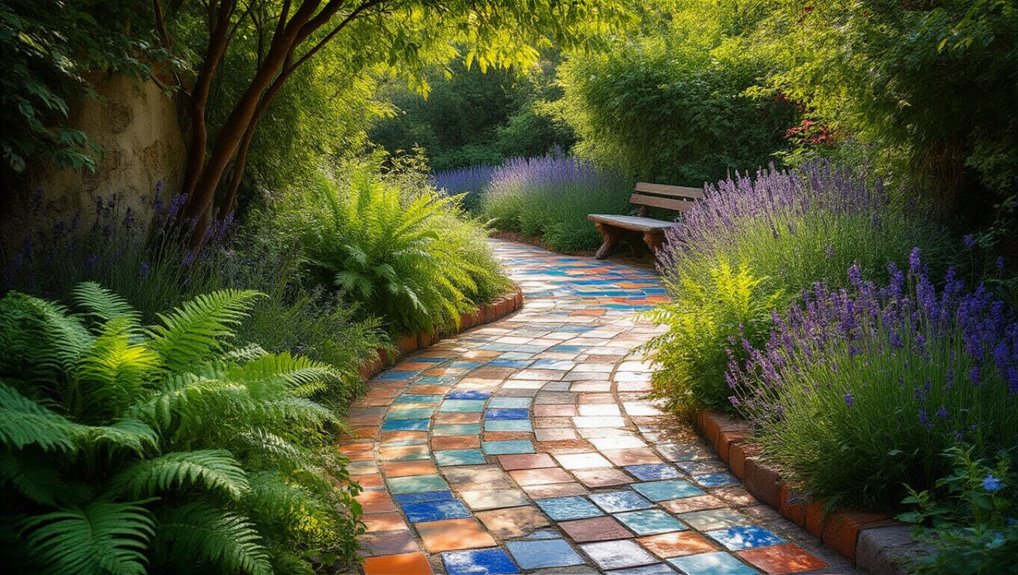
Transforming your garden with a recycled tile path not only adds character but also promotes sustainability.
Using old tiles you might’ve lying around can create a unique and eye-catching walkway that’s both functional and eco-friendly. For an extra touch of vertical beauty, consider pairing your walkway with garden trellises to support climbing plants along the path.
Here’s how to get started:
- Gather materials: Collect broken tiles, adhesive, and sand.
- Design your pattern: Lay out your tiles in a creative way before securing them.
- Prepare the base: Clear the area and level the ground for stability.
- Install the path: Apply adhesive to the tiles, press them into place, and fill gaps with sand.
In just a weekend, you’ll have a charming path that enhances your garden’s beauty while reusing materials that might otherwise go to waste. For even more personality, consider incorporating Decorative Plant Stakes to add vertical interest and whimsical accents to your new garden walkway.
Natural Stone Path
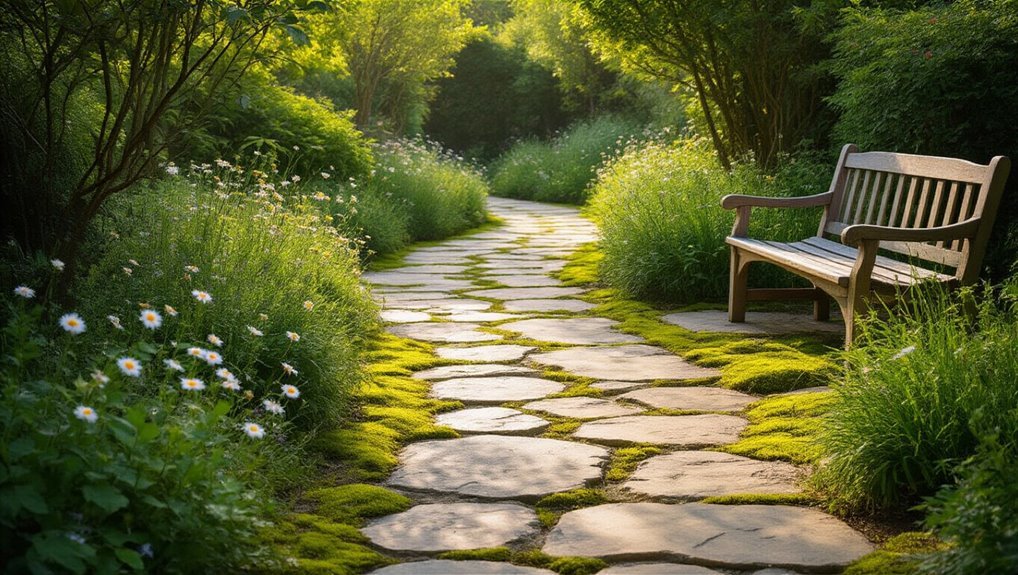
Creating a natural stone path can instantly elevate your garden’s appeal, as it blends seamlessly with the landscape while providing durability. You can choose from various stones like slate, flagstone, or river rock to match your style. Start by measuring your desired path and gathering materials. Dig a shallow trench for the stones, ensuring a stable base. Lay the stones evenly, filling gaps with gravel or soil for a natural look. This project not only enhances your garden but also creates a functional walkway. For an even more polished look, consider bordering your path with raised garden beds to define the space and introduce vertical interest. Be sure to prepare your site with the right pruning shears to clear away unwanted growth and ensure clean edges for your new path.
| Stone Type | Cost Per Square Foot | Best For |
|---|---|---|
| Slate | $3 – $5 | Modern gardens |
| Flagstone | $4 – $8 | Rustic designs |
| River Rock | $2 – $4 | Natural settings |
Cinder Block Walkway
If you’re looking for a sturdy and budget-friendly option for your garden path, a cinder block walkway might be just what you need. This DIY project isn’t only economical but also incredibly durable.
Here’s how to get started:
- Gather Materials: Pick up cinder blocks from your local hardware store.
- Plan Your Layout: Decide on the shape and size of your walkway.
- Prepare the Ground: Clear and level the area where you’ll lay the blocks.
- Lay the Blocks: Start placing the blocks in your planned design, ensuring they’re snug and level.
With these simple steps, you’ll create a functional and attractive walkway that enhances your outdoor space while staying within budget!
Flower Bed Border Path

A flower bed border path not only defines your garden’s layout but also adds a charming touch to your outdoor space.
To create one, start by choosing materials like bricks, stones, or wood. Measure the area you want to outline, ensuring it complements your flower beds. Lay out the border, keeping it level and even for a polished look.
If you’re using bricks or stones, consider a slight curve for visual interest. Fill in the gaps with mulch or gravel to enhance drainage and reduce weeds.
You’ll find that this simple addition not only guides visitors through your garden but also highlights your blooms beautifully. It’s an easy, budget-friendly project that transforms your outdoor oasis in no time!
Frequently Asked Questions
What Tools Do I Need for These DIY Garden Paths?
For your DIY garden paths, you’ll need a shovel, rake, level, garden hose for layout, and possibly a wheelbarrow. Don’t forget gloves and safety glasses to protect yourself while working on your project!
How Long Do These Paths Typically Last?
Typically, these paths last several years, depending on materials and weather. If you choose durable options, like stone or concrete, you’ll enjoy your beautiful walkways for a long time with minimal maintenance.
Can I Install These Paths on a Slope?
Absolutely, you can install these paths on a slope! Just make sure to use proper drainage and secure materials. With a little elbow grease, your garden will look like something out of a fairy tale!
What Maintenance Is Required for Each Path Type?
For each path type, you’ll need regular maintenance. Sweep debris, check for shifting stones, and refill gravel as needed. Periodically inspect for weeds and properly maintain edges to keep your path looking its best.
Are There Any Safety Precautions to Consider?
When creating paths, you should consider safety precautions like wearing gloves, using sturdy footwear, and ensuring good visibility. Check for sharp edges and trip hazards, and always follow instructions when handling tools and materials.
Conclusion
Creating a charming garden path doesn’t have to break the bank or take forever. With these ten DIY ideas, you can easily enhance your outdoor space this weekend for under $100! Did you know that adding a well-defined pathway can increase your home’s curb appeal by up to 20%? So, grab your tools and materials, and get started on your unique garden path that’ll not only beautify your yard but also boost your property value!


